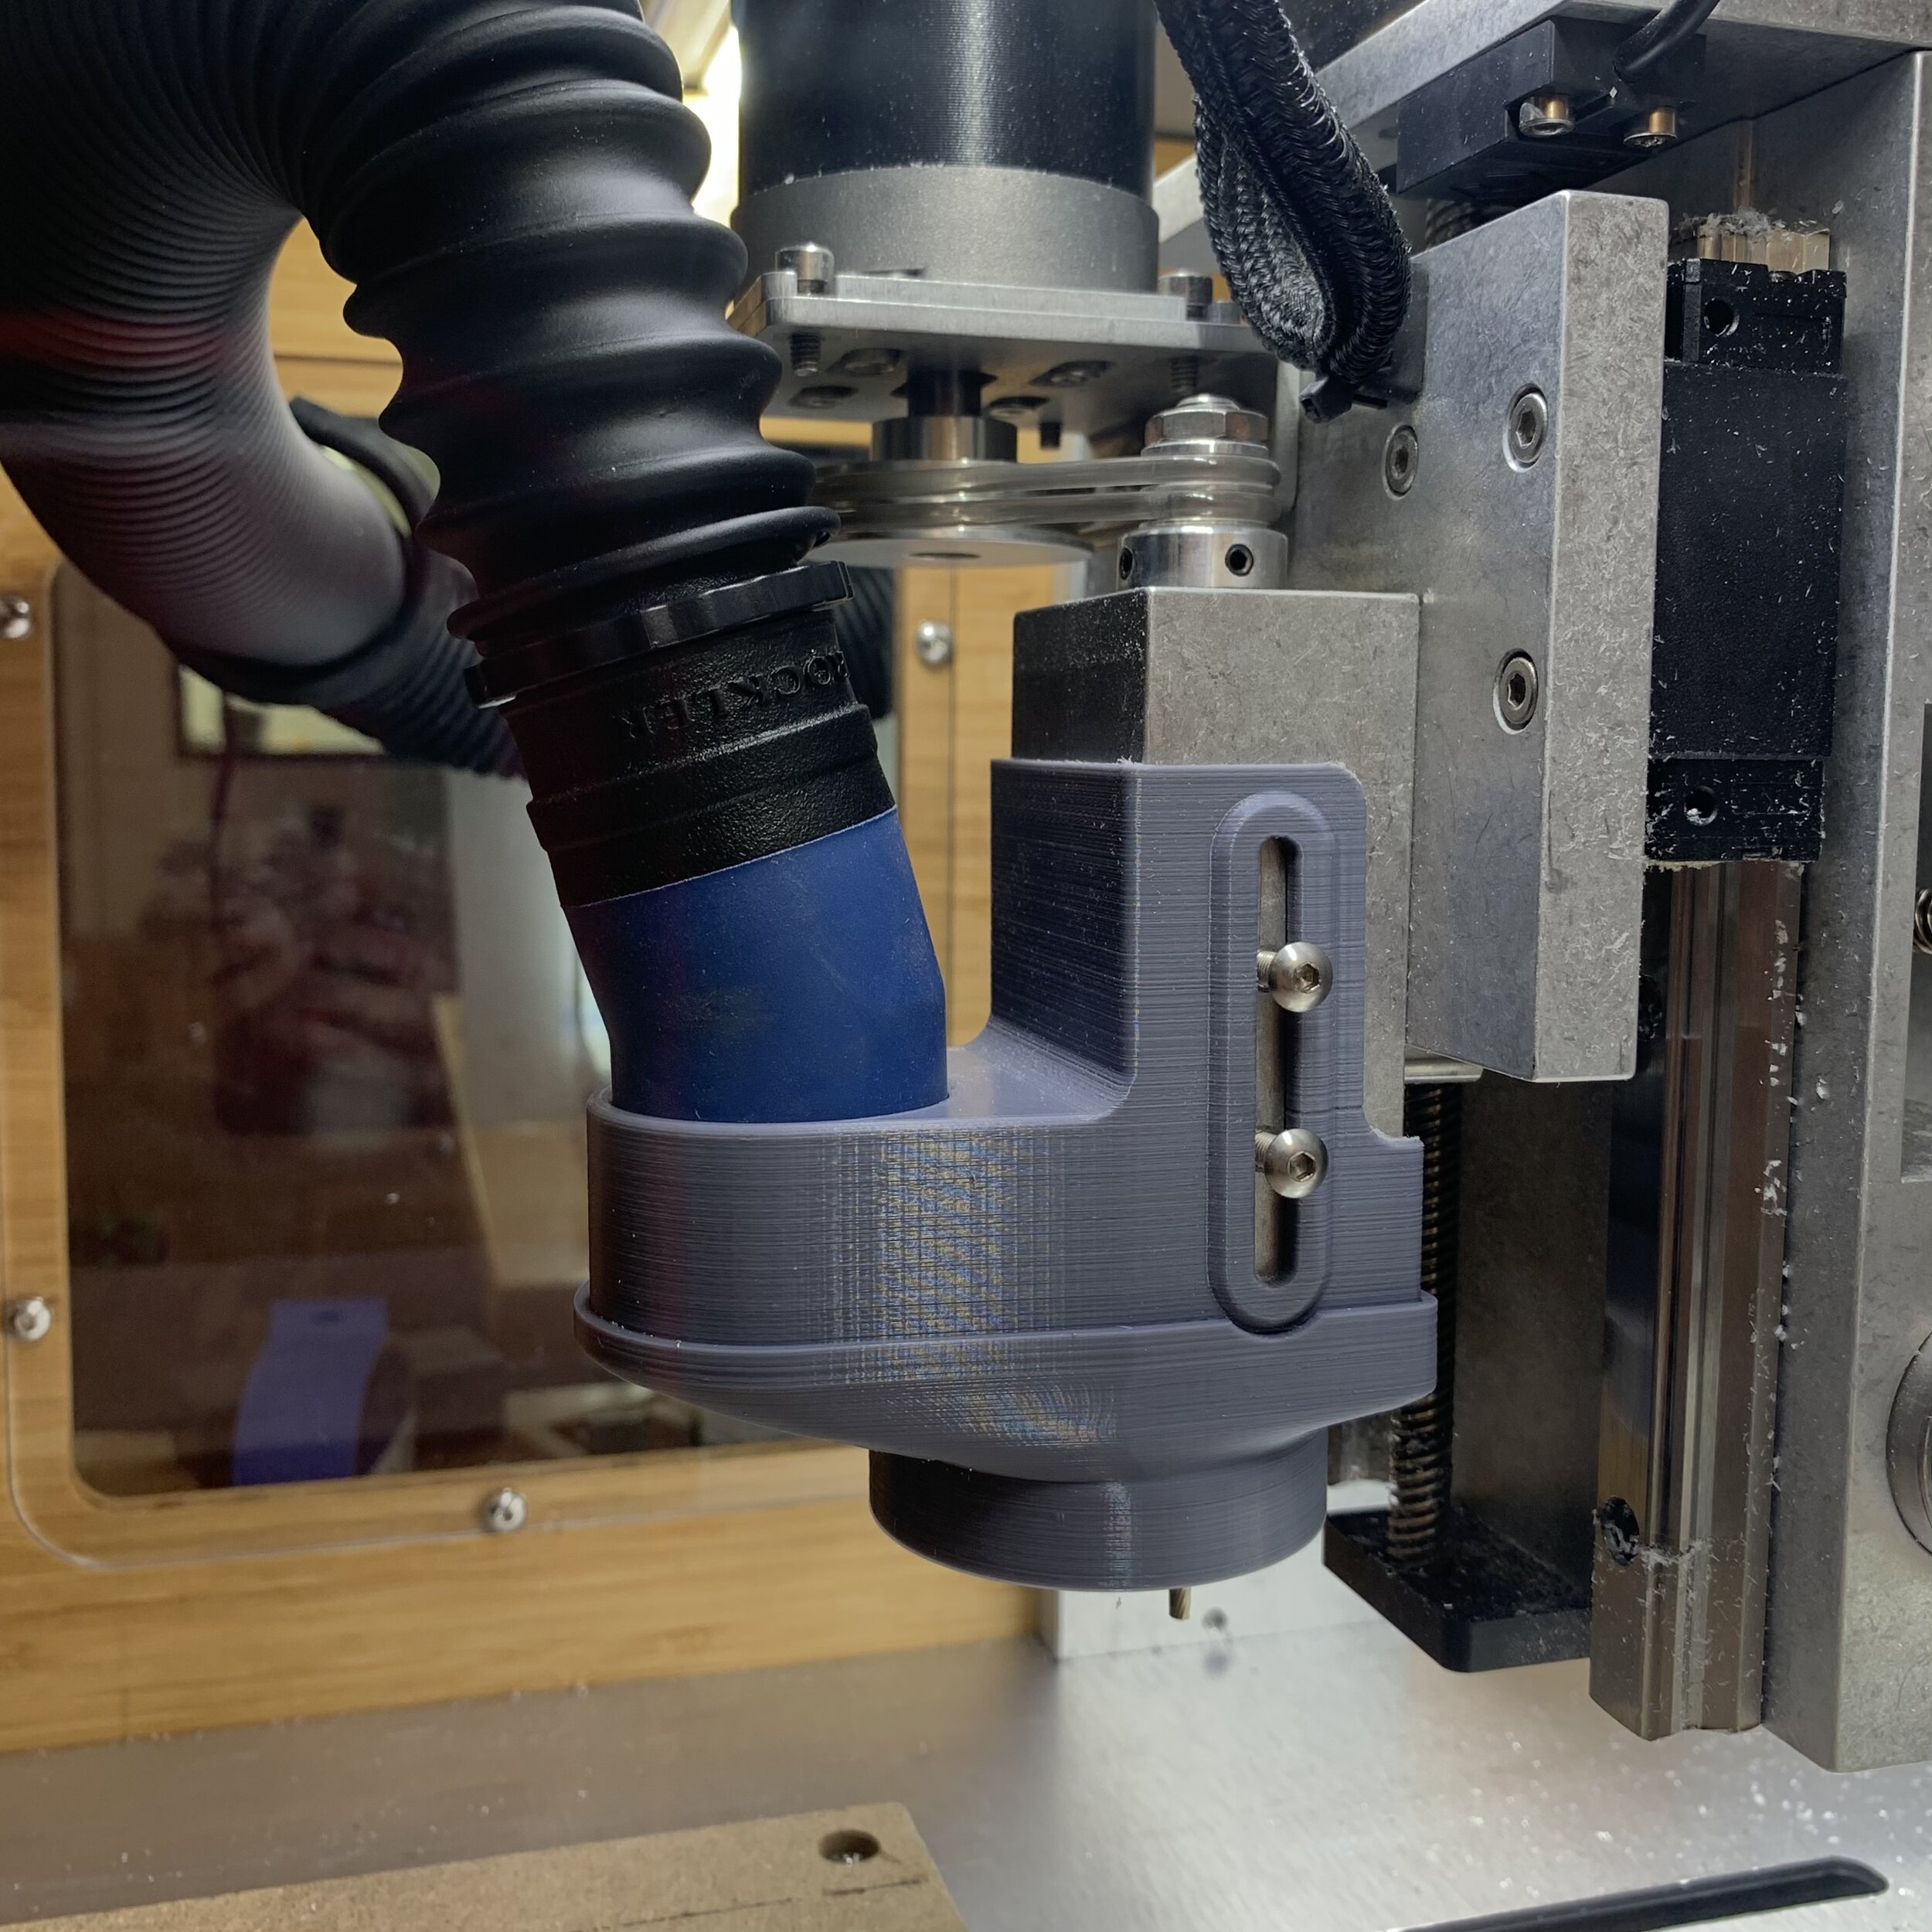
Nomad 3 Dust Boot (Unofficial, 3D Printed)
Hey guys, I've been working on an officially-sanctioned-but-still-unofficial dust management device for the Nomad. Previously I'd designed something that would take a vacuum hose and basically clamp it to the spindle, which was good enough to capture the airborne nasties that would escape from cutting MDF and stuff, but didn't have a brush. Enough people sounded like they really wanted that extra option so I threw a concept together.
This is a two-part dust shoe that works just like Sweepy. On one side I use some oversize M4 hardware (anything longer than 1cm should be able to bottom out in the hole) for the base piece to slide on. On the other side I use 1 or 2 M4 thumbscrews to lock the shoe at a fixed height.
WARNING: Lawyers say, I must dissuade you from adjusting the dust boot while the machine is in motion. If you put the thumbscrews on the left side like I have here, you can get a nasty friction burn if your fingers touch the spindle pulley… I have them on the left so I can easily access them while the spindle is in the “home” position to the right. It’s a personal choice.
There are two variants of the shoe bottom, one with just a narrower ring when you don't want a brush in the way.
This is designed specifically for the Rockler Dust Right FlexiPort Power Tool Hose Kit, which is *the softest, most flexible hose I have ever seen*. I made a little printable clip you can use to route the hose out of the enclosure. Cutting a hole in the side window is optional. You could also use a Forstner bit to make a hole in the side panel.
At the highest position, it should put the bottom of the dust shoe above the collet so you can mill with a fairly short tool without fear of collision.
Provided below are STL files for all components + Fusion file for the mounting base so you can tweak the vac port size (ex. shrinking to 35/36mm for Festool hose). Consider this shared under CC BY-NC-SA 4.0. Your mileage may vary, no support will be provided.
Dust Boot Files
You will need to provide:
4 - 1/4" (6.35mm) x 1/16" round disc magnets
2 - M4 screws > 10mm in length
1 or 2 - M4 thumbscrews < 10mm in length (ex. https://www.mcmaster.com/92581A230/ )
1 - Brush strip
3D Printing Comments:
You may be able to get away without support if you’re smart about it. Otherwise I’d suggest limiting support to “Touching Buildplate Only” and for areas steeper than 80 degrees. I print all components in their normal orientation (on the dust boot, the bristled part faces downward) to minimize the need for support.
If your printer tends to over-extrude or have elephant foot-ing, you may need to lightly sand areas of interference with the spindle block.
You may also want to use a 1/4" endmill to ream the magnet pockets to ensure the press in smoothly. Use CA glue to lock them in, and a piece of plastic to press them flush.


