
DIY Smartphone Macro Lens from a DVD Drive
Based loosely on Easy Macro's Kickstarter concept, I turned my old iPhone into a low-power microscope. I was taking apart an old DVD burner yesterday for a computer-related project when I was rudely interrupted by the urge to try something I had read about before: making a macro lens attachment out of the objective lens from a DVD drive's optical pickup assembly. If that last sentence made no sense, read on. If it did make sense... read on as well.
 Inside a CD or DVD drive is a sled that carries a laser and a sensor that work together to read data off a spinning disk. The laser (and the reflected return signal from the disk) have to be tightly focused within a short distance. This requires the use of a magnifying lens (and a couple reflective elements, but I digress).
 By stacking this lens in front of your smartphone's camera, you can allow it to focus on objects less than an inch away from the sensor.
 Having verified that this actually works by observing the ugliness of a Sharpie label, I set out to make a simple way to mount the lens in front of my iPhone 4S's camera. I would have done it on my iPhone 5S, but I have a backplate on it that won't let me get the lens close enough.
 With most of my tools at my apartment, I resorted to using an engraving on my dremel to cut out a piece of 5mm plywood in which to embed the DVD drive lens. One corner was rounded to comform to my iPhone's bumper.
 I slowly opened up a 1/4" hole using a cone-shaped sanding bit until it was a snug fit for the lens. Then I had to work out the mounting.I took inspiration from Easy Macro's product, which is a lens directly embedded in a rubber band. They sell it for $15, which I find is a little steep. I would price it around $5... no more than $10.
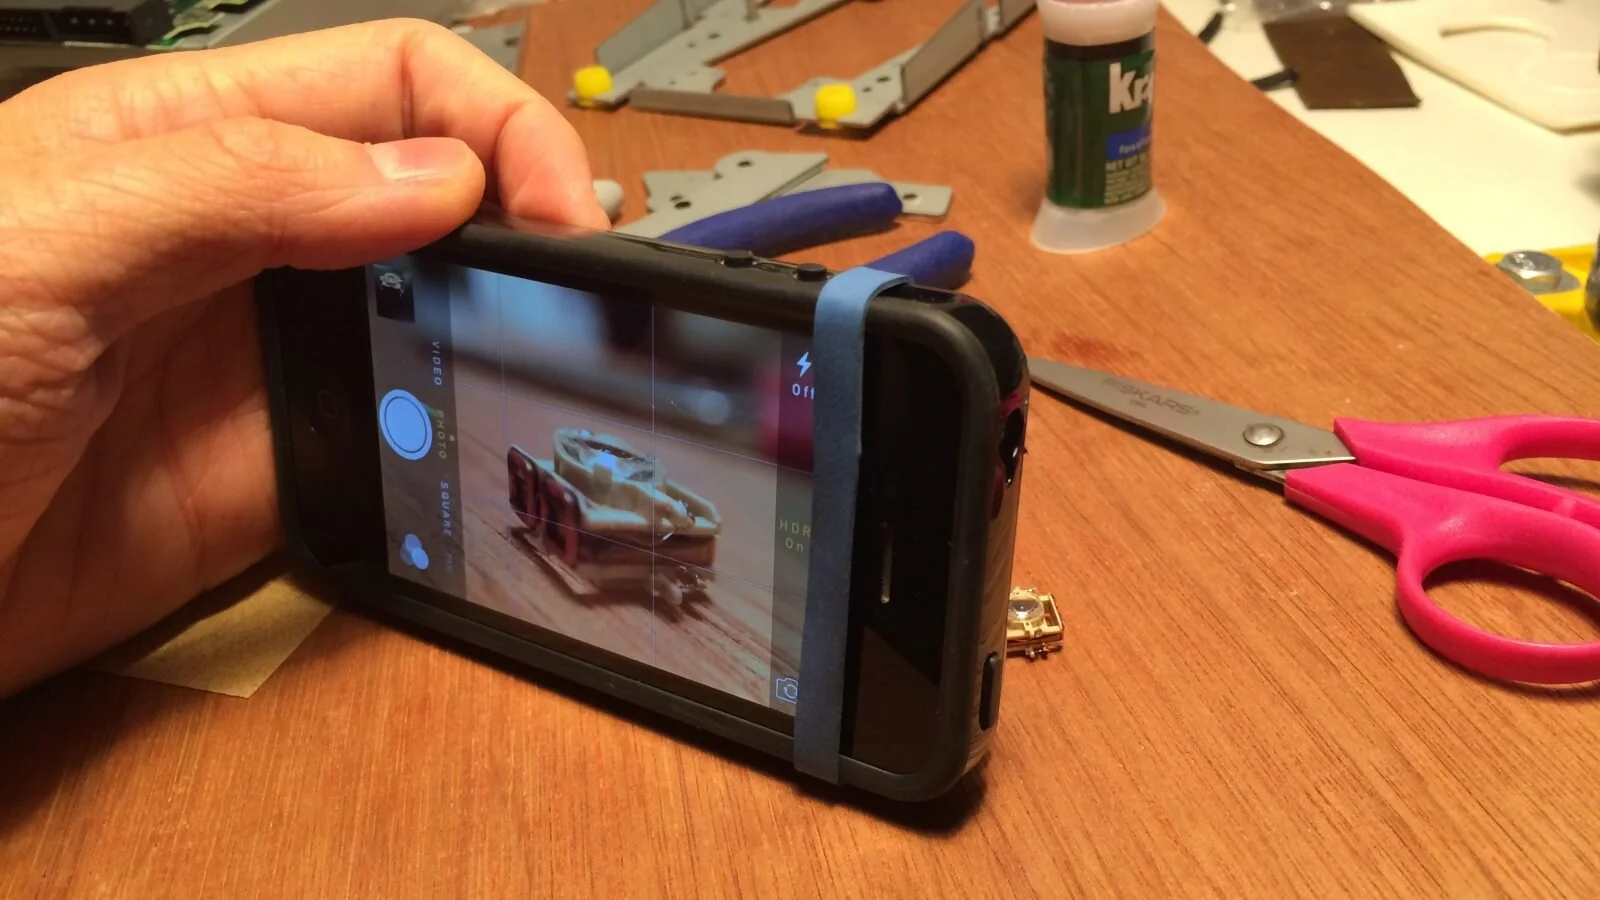
 I cut a rubber band to length and glued it to the lens adapter. Here's how it looks on the phone:
 There are two things I would fix in hindsight.1. Paint the entire thing matte black to reduce it's visibility in reflections.2. Make the rubber bands a little tighter. As it is now though, it won't fall off my phone even if you shake it violently.
 I tested it on some 60 grit sandpaper and was pretty impressed with the resolution. Depth of field is very shallow, and it's compounded by soft focus around the edges of the photo. Only the center of your shot is going to be usable. Let's look at something else.Here's something I would have trouble taking a picture of with just about any camera.
 And here's what it looks like through the macro lens.
 How about the magnetically suspended lens element from the pickup assembly?
 Good enough to make out the extremely fine wires of the element's electromagnet windings. Then I got bored before bed and started watching Smarter Every Day. This is Destin's YouTube logo thumbnail underneath the video. You can see the RGB breakout of each pixel, and I know you can do that with a drop of water, but this is far more controlled.
 All in all, I'm very pleased with this as a project. It took me almost nothing, and took very little time, but the result is something I can have a lot of fun with almost anywhere.
 If you have a dead optical drive lying around, I highly suggest breaking it open and making something useful out of it, in addition to admiring just how much engineering goes into a $20 product.